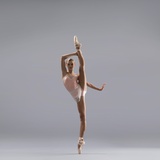
What kind of pointe shoes do you wear?
I currently wear Freed Classics with custom specifications (A or Star makers). However, I am actually waiting another month for an incoming Freed order, so I have experimented with wearing the Bloch Synthesis as a back up stock option; it’s a fantastic, sleek shoe! My advice to Freed wearers: always have a few backup makers or a stock shoe you can go to just in case your order has a longer wait time.

Photo by Mary Fehr
So, what’s your pointe shoe preparation process?
Step 1: The Shape
The first step I take to prepare my pointe shoes is gently stepping on the box to make the box flatter and more snug to my low profile foot.
Step 2: The Glue
After flattening the box, I jet glue the inside of the platform and up the shank about two to three inches up the side to prevent the box from “bubbling” away from the shank.
Step 3: The Shank
I bend the shank at the “demi pointe” position and also pull the inner decorative insole out to make the bottom feel flatter. Then, I quarter the shank by pulling the top nail out and cutting off about a third of the inner part of the shank so it hits right at the instep. I say about a third because a quarter is not enough, and I will feel like I cannot get over the platform. Half is too much, and I feel like I will go flying out of the shoe! After cutting the inside of the shank, I add a bit of glue to reinforce it so my foot is supported in just the right spot.
Step 5: The Darning
The most time consuming part of my “break in” process is darning the front and side edges of the platform. However, I have gotten the time down to about five to ten minutes per shoe, depending on how distracted I am while sewing. I use cotton kitchen twine, which you can find at just about any store, and tie a tight series of knots to make the edge of the darning. I lock stitch the twine to the outer sides and front edge of the platform with plain, waxed dental floss. It ensures better ankle alignment, prevents me from going too far over the front, can correct an irregular platform shape, and helps the tip of the shoe last twice as long. For me, if the shape of the platform does not stay intact, the shoe is practically unwearable and dangerous.
Step 6: The Finishing Touches
Lastly, I will sew stretchy ribbons (Body Wrappers is the best!), criss-cross the elastics, and they are ready for class and performance. I usually sew my shoes about three or more at a time so I can rotate through the week and always have a back up pair ready to go!


